
Rimo in Notion
Ask about your meetings without leaving Notion. You add Rimo to a Notion Custom Agent once as a custom MCP connection, sign in with your own Rimo account, and then ask in plain language — "What did we decide about pricing?" — and the agent looks the answer up in your meeting notes and replies.
Ask what a meeting covered, what was decided, what the action items are, who attended, when it was held and how long it ran, or search back for an older meeting. See Example things to ask.
The server URL to add:
https://mcp.rimo.app/mcpRimo runs on a Custom Agent, not in ordinary Notion AI chat. Per Notion's documentation, MCP connections are available to Custom Agents only.
Using Claude, ChatGPT, or Microsoft Copilot instead? See Rimo in Claude, Rimo in ChatGPT, or Rimo in Microsoft Copilot. On your own machine with a coding tool (Claude Code, Cursor, Codex)? See Rimo in Coding Tools.
Before you start
- A Notion workspace on a plan that includes MCP connections — Notion's documentation lists them as available on Business and Enterprise.
- Custom MCP servers enabled for the workspace. If Add custom MCP isn't in the connection list, a workspace owner or admin has to turn it on — see Notion's MCP connections guide.
- A Rimo account — the same one you normally sign in with, in an organization. Nothing to install.
You never type a Rimo password or key into Notion. You sign in on Rimo's own page, in your browser.
Add Rimo to a Custom Agent
1. Create a Custom Agent
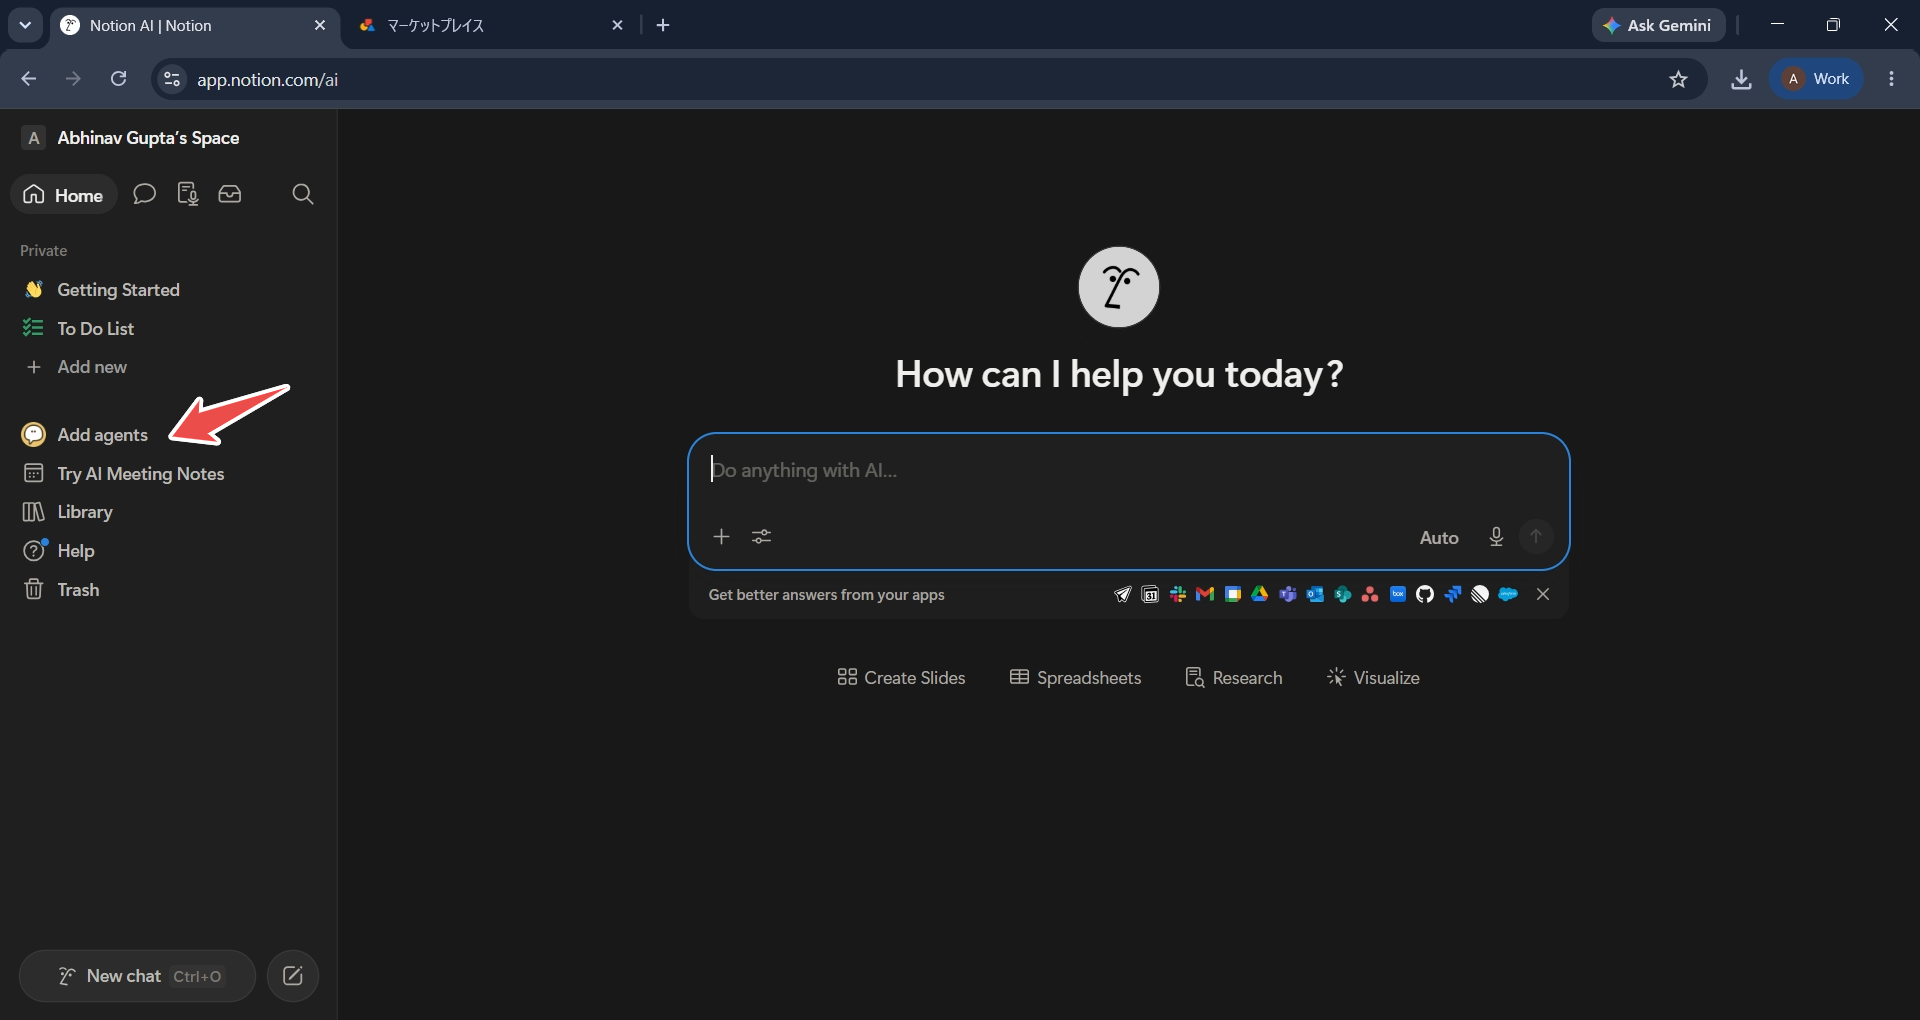
In Notion's sidebar, select Add agents.
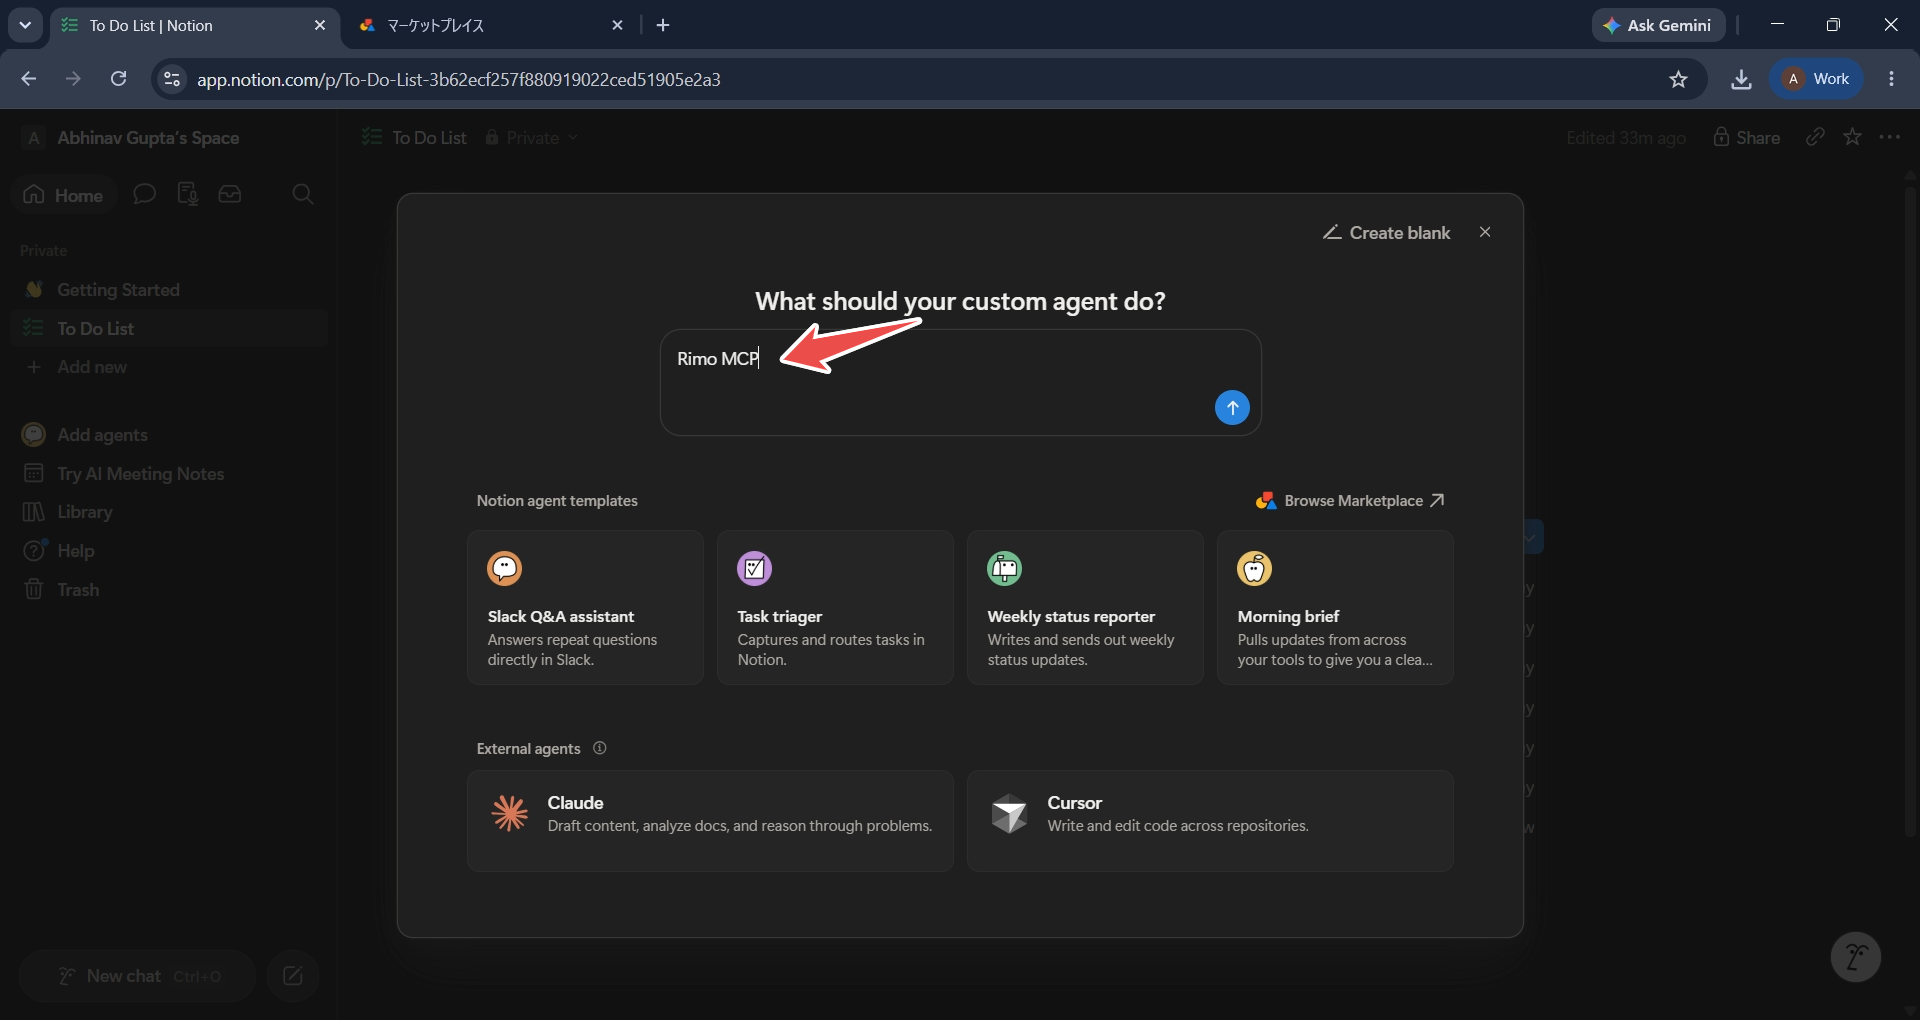
Describe what the agent is for — for example Rimo MCP — and create it. Create blank skips the description.
2. Open Tools and access
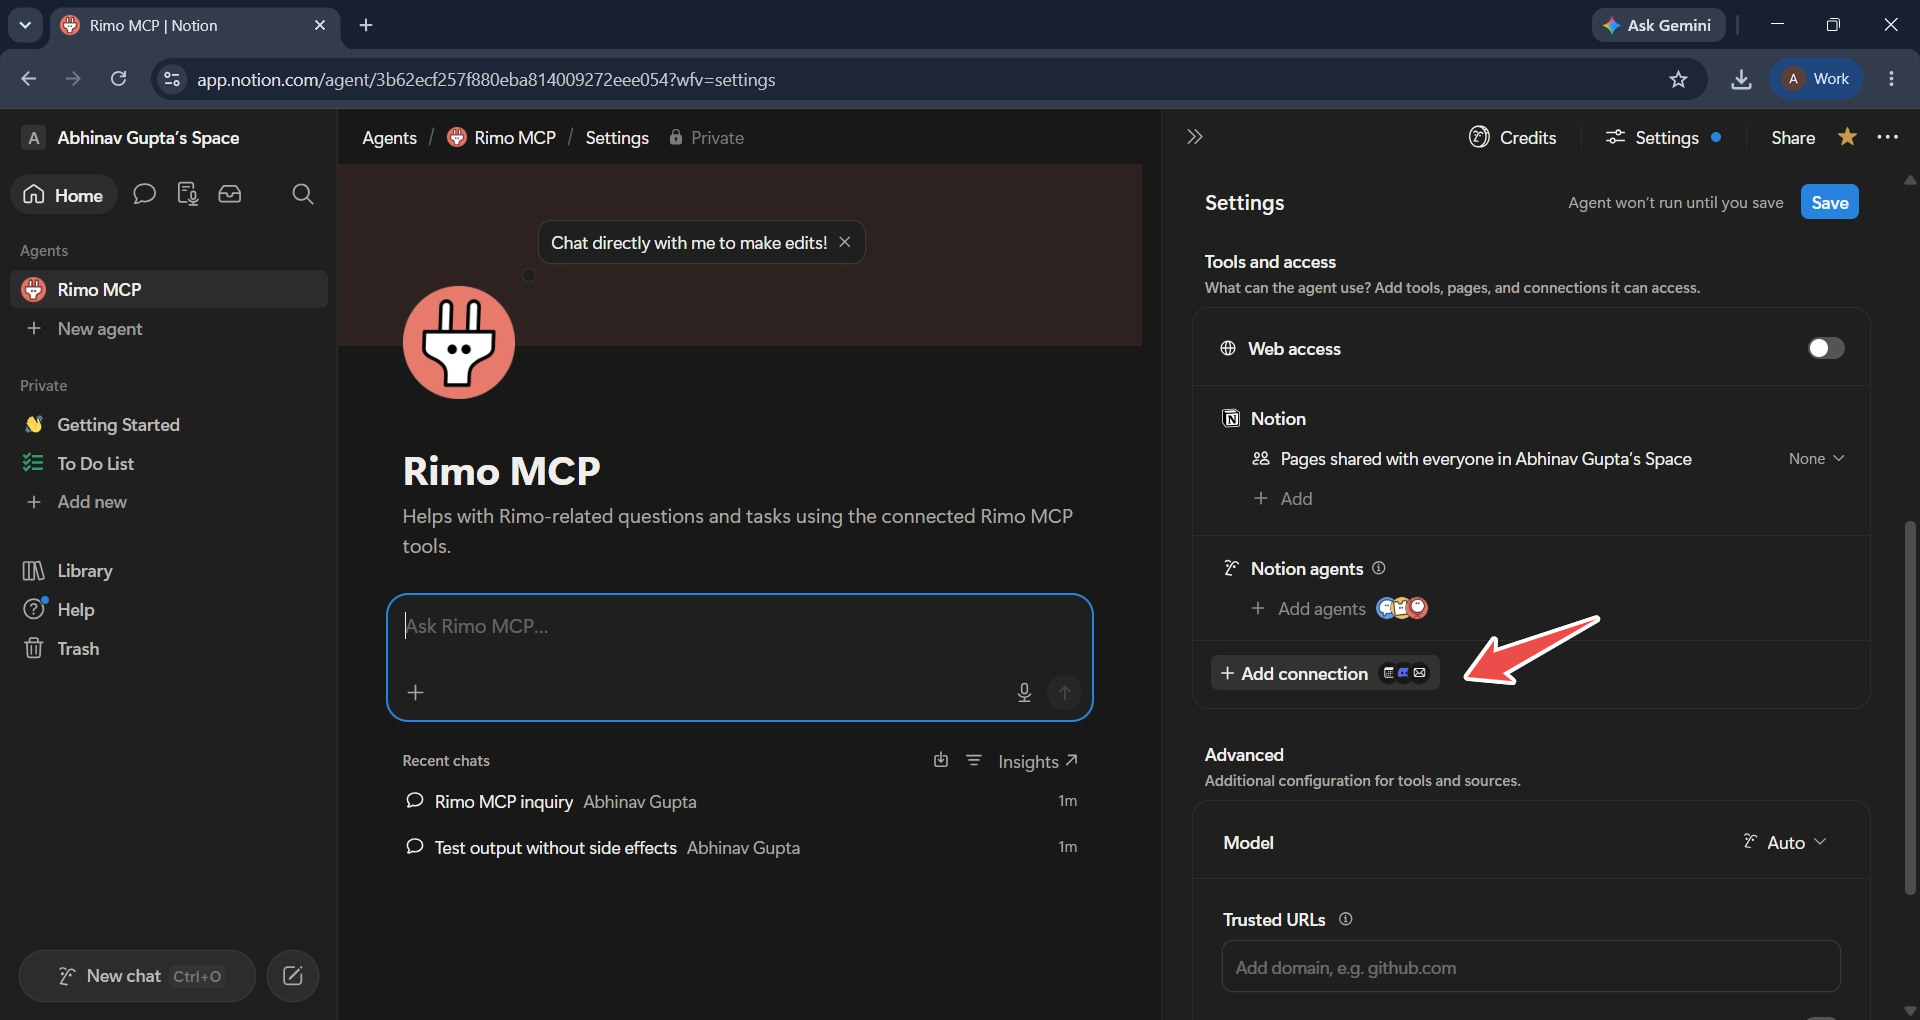
Open the agent's Settings, go to Tools and access, and select Add connection.
3. Add a custom MCP connection
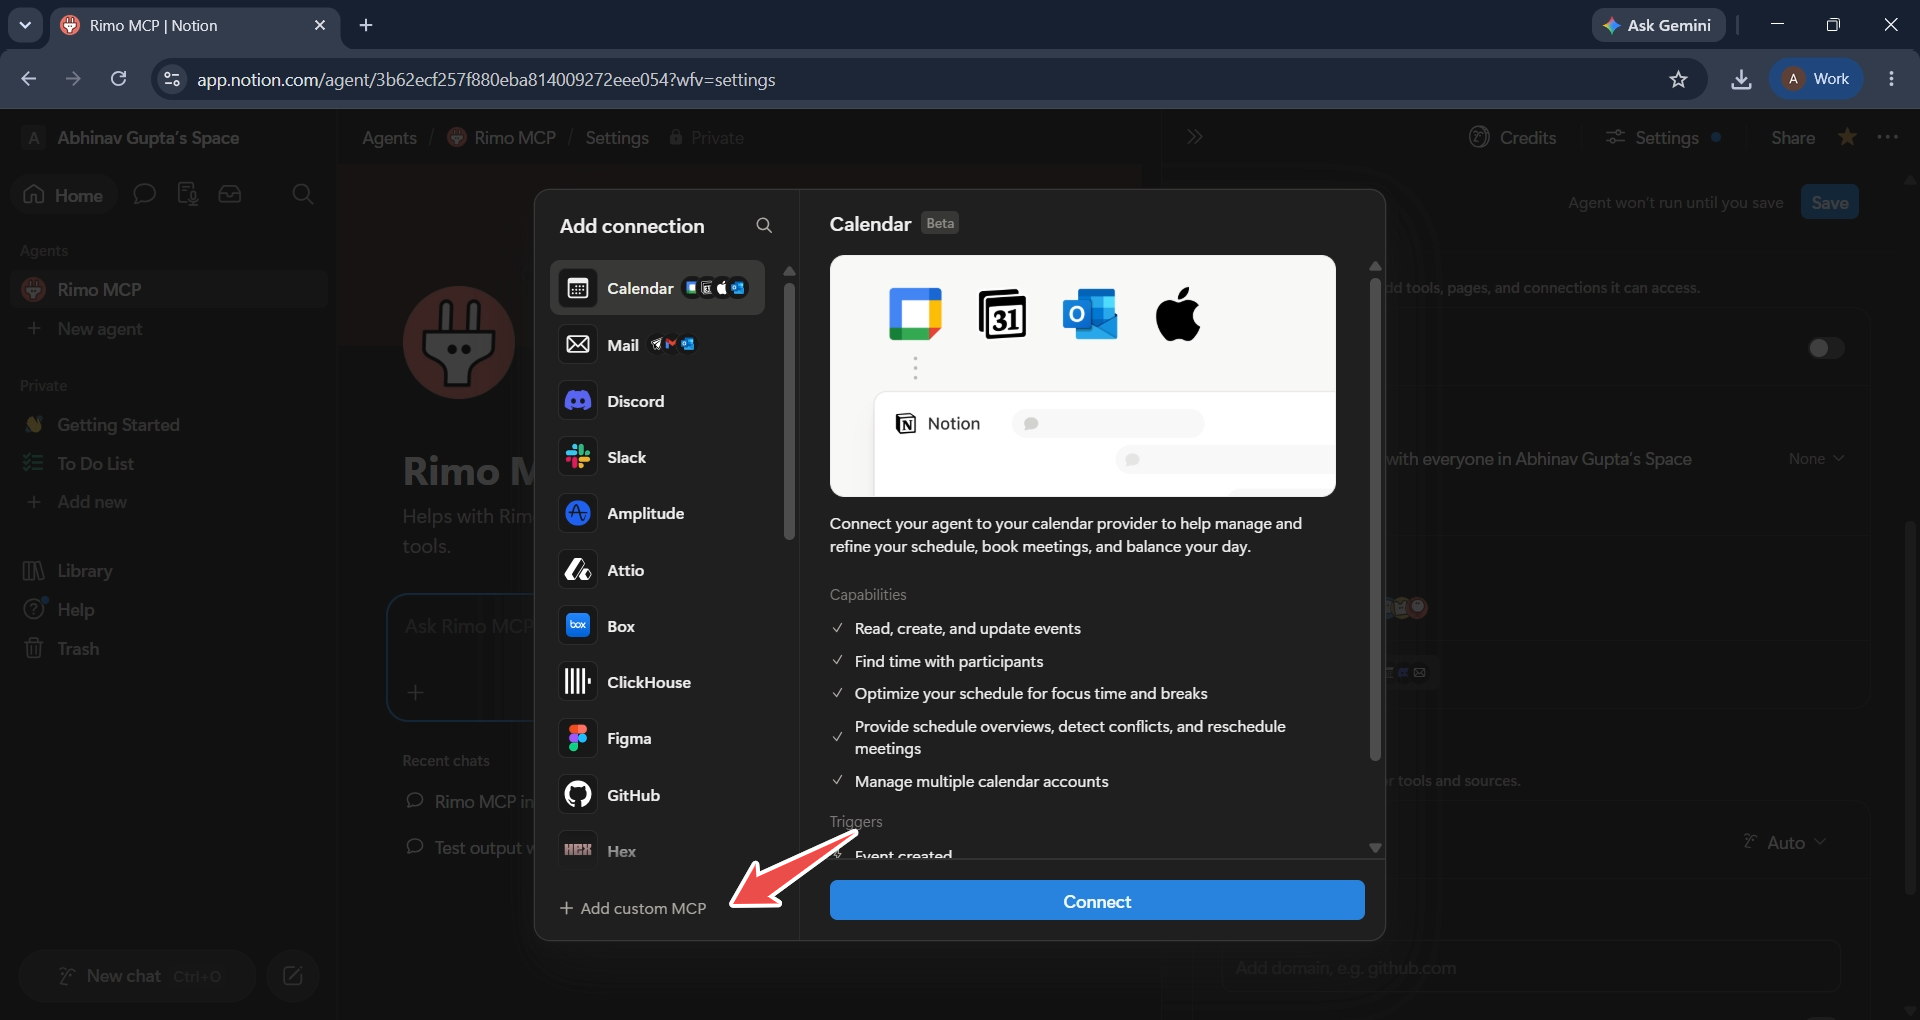
The connection list opens. At the bottom, select Add custom MCP.
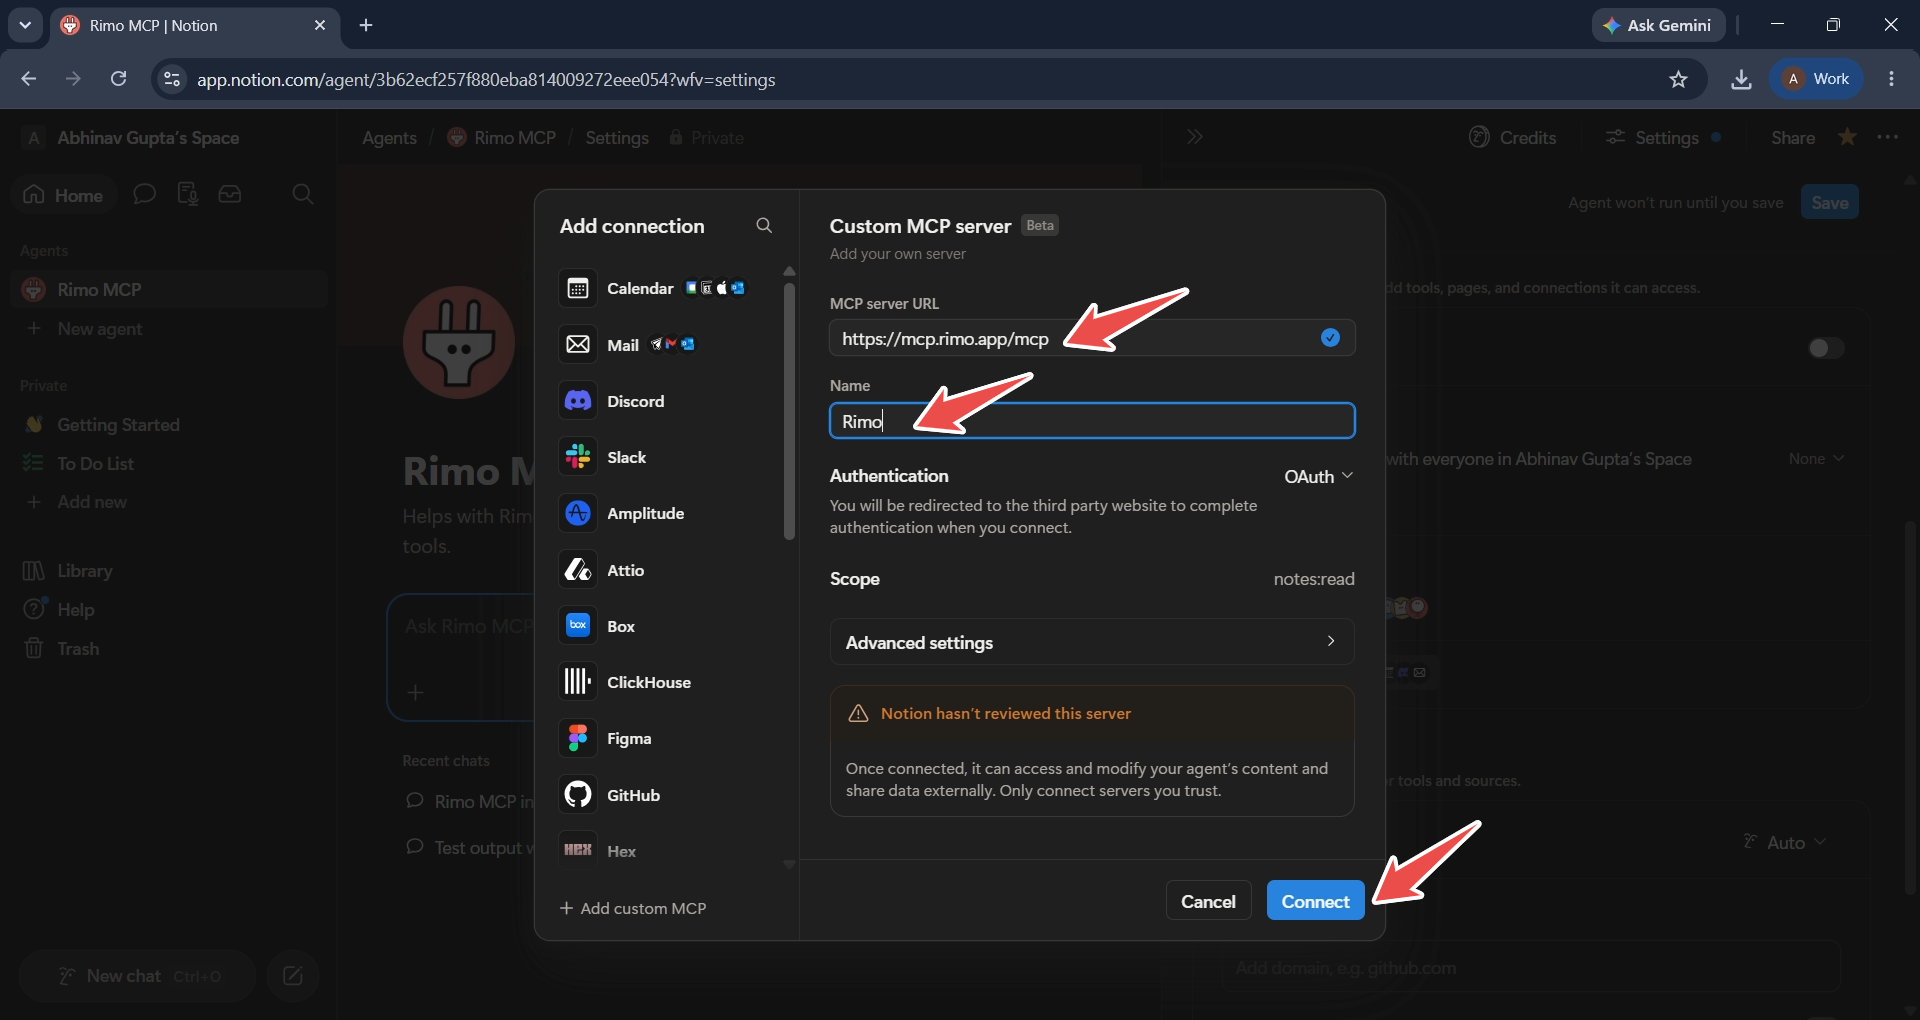
4. Enter the Rimo server details
Fill in the server details, then select Connect:
- MCP server URL:
https://mcp.rimo.app/mcp - Name:
Rimo - Authentication: OAuth
Notion shows the requested Scope — notes:read — and a Notion hasn't reviewed this server notice, because Rimo is a server you add yourself rather than a Notion-reviewed integration.
5. Sign in to Rimo
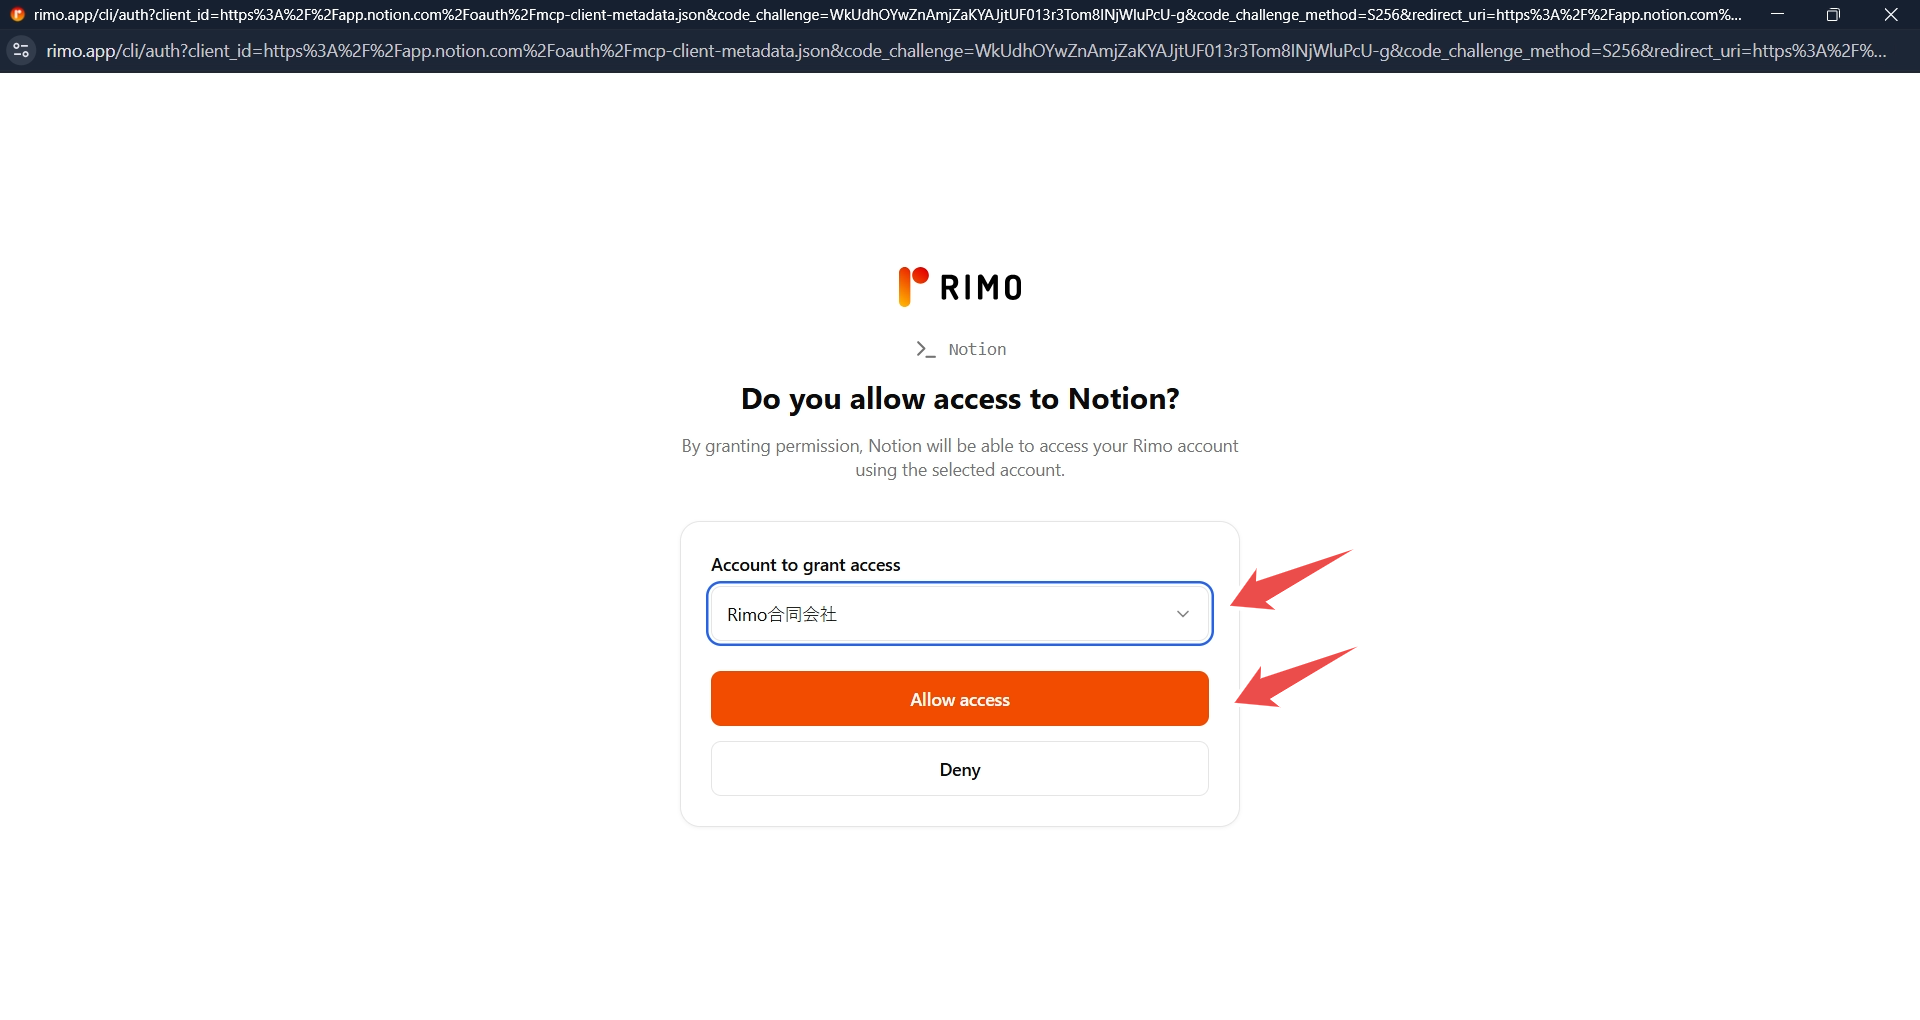
Rimo opens in your browser and asks whether to allow access to Notion. Under Account to grant access, choose the Rimo organization the agent may use, then select Allow access.
6. Save the agent
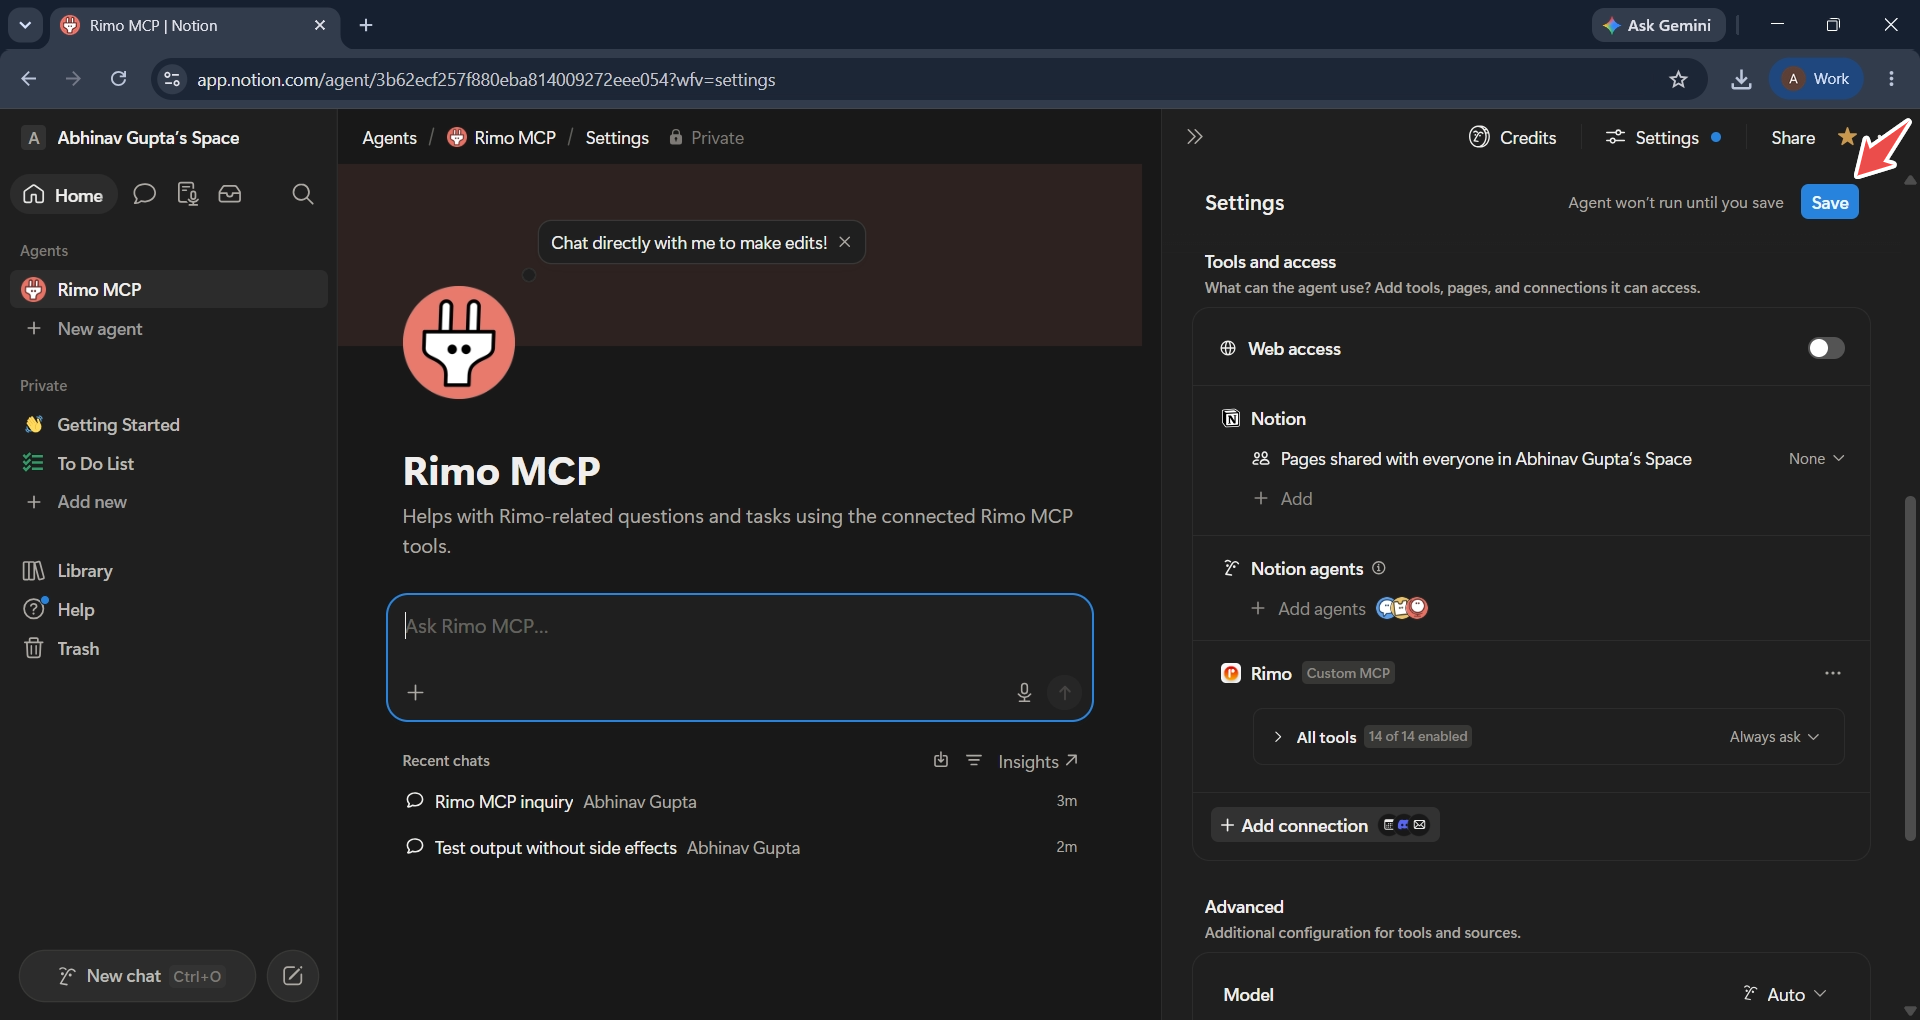
Back in Notion, Rimo is listed under Tools and access with a Custom MCP label. Select Save — the agent won't run until you do.
7. Ask your first question
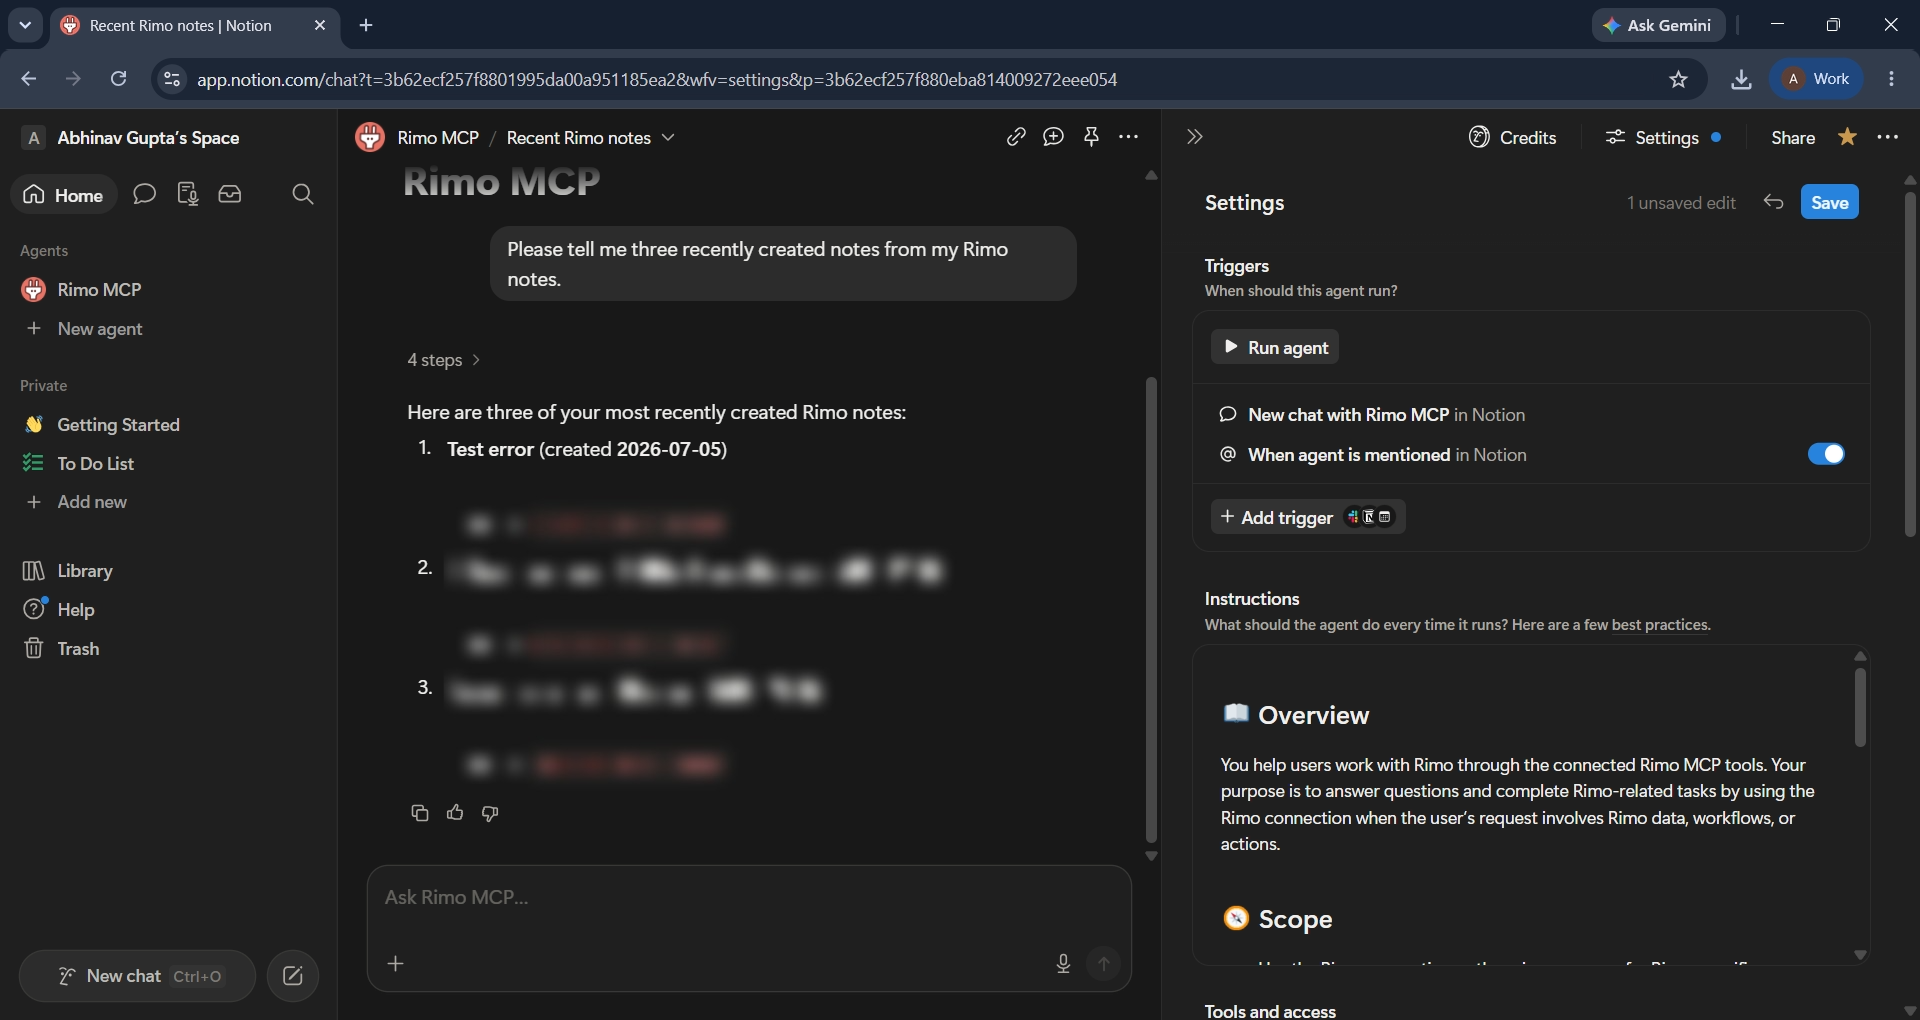
Open the agent and ask in plain language. A listing question is the quickest way to confirm the connection works:
Please tell me three recently created notes from my Rimo notes.The agent calls Rimo and answers from the notes your own Rimo account can see.
From there, ask about a meeting the way you'd ask a colleague — see Example things to ask.
Example things to ask
No commands to memorise. Name the meeting you mean — "my last meeting", "last week's meetings", "our client meeting" — and ask:
- "Tell me about my last meeting."
- "What were the key decisions from last week's meetings?"
- "What action items came out of our client meeting?"
- "Who attended the meeting?"
- "How long did the meeting last?"
- "Find the meeting where we discussed the Q3 roadmap."
- "What did we decide about the product launch?"
You only ever see what you can see in Rimo, and the connection is read-only — nothing it does changes anything in your notes. For the full list of what it can reach, see What you can do with MCP.
Good to know
- Custom Agents only. Per Notion's documentation, MCP connections don't work in ordinary Notion AI chat.
- The connection belongs to one agent. Notion's documentation states each MCP connection is unique to a single Custom Agent, so another agent needs its own.
- Save after you connect. Notion warns that the agent won't run until the settings are saved.
- One Rimo organization at a time. The organization you pick at Allow access is the one the agent sees. To use a different one, remove the Rimo connection in Tools and access and add it again, choosing the other organization.
- Read-only. The connection asks for the
notes:readscope, so the agent can read your notes but never change them — see What you can do with MCP. - Custom MCP is labelled Beta in Notion.
Official Notion help
- MCP connections for Notion Custom Agents
- Connect Custom Agents to your tool stack with MCP integrations
- Security best practices for Agent connections
See also
- Rimo in Others — every other tool Rimo works in
- What you can do with MCP — the tools and example prompts, once you are connected
- Rimo in Claude — the same thing for Claude
- Rimo in ChatGPT — the same thing for ChatGPT
- Rimo in Microsoft Copilot — connect through a Copilot Studio agent using DCR
- Authentication — how Rimo sign-in and accounts work